How Moms Can Use the Design Process in Interior Design to Make Their Homes Stylish (on a Budget!)
Your step-by-step blueprint to creating a beautiful, functional, and affordable home—without the overwhelm.
Every mom knows the feeling: you want a stylish home that feels warm, intentional, and pulled together… yet you’re juggling kids, work, school drop-offs, sports practices, laundry piles, and the mental load of managing a household. Decorating can quickly slide down the priority list because it feels like a huge, expensive project that requires time you don’t have.
But here’s the secret: designing a beautiful home doesn’t require a giant budget or a degree in interior design. It just requires a process. When moms use the same step-by-step design method that professionals rely on, decorating becomes easier, less stressful, and—dare I say—fun.
This blog post walks you through that design process in interior design in a mom-friendly, real-life way. Whether you’re redoing your living room, refreshing your bedroom, or making a playroom feel intentional instead of chaotic, this guide will help you create stylish spaces without overspending and without wasting time.
Table of Contents
Why Moms Should Use the Design Process Instead of “Winging It”
If you’ve ever bought something you thought would look good—only to get home and realize it’s the wrong size, color, or style—this is where the design process saves the day.
Using a design process gives you:
A clear plan
No more wandering HomeGoods feeling overwhelmed or guessing which pillow “might” work.
A cohesive look
Your rooms flow together instead of looking like a hodgepodge of random finds.
A smarter use of budget
You won’t waste money on the wrong items. You only buy things that fit your plan.
Less stress and more confidence
You get to enjoy your home instead of feeling frustrated by unfinished spaces.
Even small upgrades—like rearranging furniture or upgrading a $15 thrift store find—look elevated when they’re part of a bigger vision.
What Is the Design Process in Interior Design?
The design process in interior design is a structured, step-by-step method that designers use to transform a space from an initial idea into a fully realized, functional, and beautiful environment. It’s the roadmap that guides every decision—from understanding a client’s lifestyle and needs, to choosing the right colors, layouts, and furnishings, all the way through installation and final styling.
At its core, the design process helps ensure that every choice is intentional, budget-friendly, and aligned with the overall vision. Whether you’re a professional designer or a mom decorating her home on a budget, this process brings clarity, saves time, and prevents expensive mistakes. It breaks the project into manageable phases so you can confidently plan, visualize, and execute your design goals.
Most interior design processes include five to seven key phases, commonly:
- Discovery & Assessment – Understanding goals, needs, preferences, problem areas, and how the space is used.
- Inspiration & Concept Development – Gathering ideas, creating mood boards, defining style and direction.
- Space Planning & Layout – Mapping out furniture arrangements, flow, and functionality.
- Design Development – Selecting materials, colors, finishes, textiles, decor, and furnishings.
- Budgeting & Sourcing – Pricing items, comparing options, and finding cost-effective solutions.
- Implementation – Purchasing items, coordinating deliveries, painting, assembling, installing.
- Styling & Final Review – Adding finishing touches, adjusting details, and ensuring everything works together.
Ultimately, the design process takes a big, overwhelming project and turns it into a clear action plan—making it possible to create a stylish, cohesive home without stress or guesswork.
Step 1: Define Your Vision (Dream, Don’t Filter Yet!)
Before you buy a single throw pillow, you need to know your style, your goals, and the feeling you want your home to have.
Start With a Mood Board
You can do this on Pinterest, Canva, or by screenshotting images you love. Aim for 15–25 photos that reflect your dream home.
Look for:
- Colors that make you feel calm or energized
- Textures you love (linen, rattan, wood, boucle, etc.)
- Layouts that fit your lifestyle
- Decor styles you naturally gravitate toward (modern farmhouse, coastal, boho, minimalist, Scandinavian, English cottage, maximalist, etc.)
Ask Yourself:
- How do I want this room to feel? Cozy? Airy? Vibrant? Peaceful?
- What do we use this room for every day?
- What is frustrating me about the space right now?
Pro Tip for Moms:
If your style and your kids’ needs feel like they’re battling each other, don’t panic. You can absolutely create a stylish home with kids—just choose practical materials (performance fabrics, washable rugs, baskets, toy organization that closes, and layouts that leave space for play).
Step 2: Measure and Map Out the Space
This is where most people skip ahead and make mistakes. But planning your layout before buying anything saves a ton of money.
Take Measurements
Measure:
- Room dimensions
- Wall lengths
- Window height and width
- Distance from doors to corners
- Ceiling height
- Existing furniture pieces you’re keeping
Sketch Your Room Layout
You can draw on paper or use free apps like:
- Room Planner
- MagicPlan
- Floorplanner
- IKEA Home Planner
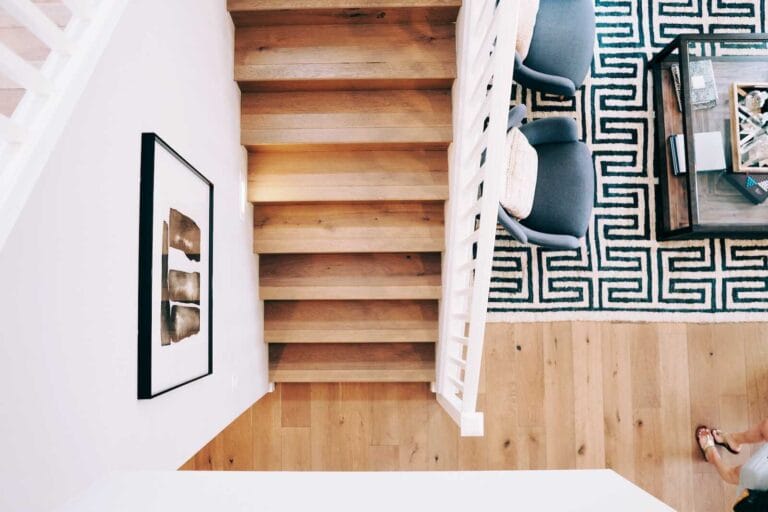
The Power of a Well-Planned Layout
Many moms think their home feels messy or cramped because of clutter. But often, the real issue is a poor layout.
When you choose the right furniture sizes and placements:
- Your home feels bigger
- There’s better traffic flow (mom win!)
- It’s easier to clean
- Kids have defined spaces to play
- Every corner has purpose
Budget Tip:
Start by shopping your home. Before buying something, see if another piece you already own fits better in that spot.
Step 3: Set a Realistic Budget (and Stretch It Like a Pro)
Budget isn’t a barrier—it’s a boundary. And boundaries help you get creative.
Break Your Budget Into Categories
Instead of saying “$300 for the living room,” divide it like this:
- Rug
- Lighting
- Artwork
- Accent furniture
- Main furniture (sofa, coffee table, dresser)
- Décor (pillows, greenery, baskets)
This makes it easier to prioritize what matters most.
Where to Save
- Throw pillows
- Baskets
- Curtains
- Artwork (you can print digital art for $5–$15)
- Trendy accessories
Where to Splurge (If You Can)
- A quality sofa
- A durable rug
- Good lighting
- Anything you use every day
Mom-Friendly Savings Hacks
- Facebook Marketplace (goldmine for high-end pieces)
- Thrift stores & Habitat ReStores
- Buy-Nothing groups
- IKEA hacks
- Repainting existing furniture
- Changing hardware on cabinets or dressers
- Using Craigslist “Free” section for DIY projects
Step 4: Choose Your Color Palette
Color is the glue that holds a room together—especially when you’re decorating on a budget.
Start With a 3–5 Color Scheme
The easiest way:
- A main neutral (warm white, beige, greige, soft gray)
- A secondary neutral (oak, rattan, black accents, wood tones)
- One main color (sage, navy, blush, mustard, forest green)
- One accent color used sparingly
Tips for Moms
Choose colors that hide fingerprints and mess!
- Medium-tone sofas hide spills better than white.
- Patterned rugs disguise crumbs and stains.
- Black or brushed brass hardware adds elegance without upkeep.
The 60-30-10 Rule
- 60% main color
- 30% supporting color
- 10% accent color
This helps even a $50 room refresh look intentional.
Step 5: Pick Your Materials and Textures
Texture adds richness, and you don’t have to spend a lot to achieve it.
Affordable Texture Options
- Woven baskets
- Rattan trays
- Chunky knit blankets
- Linen-blend curtains
- Ceramic vases
- Faux greenery
- Woven ottomans
- Jute or cotton rugs
Kid-Friendly Materials
- Performance fabric
- Indoor-outdoor rugs
- Washable throw blankets
- Slipcovers
- Smooth round edges instead of sharp corners
- Leather (easy to wipe clean)
- Laminate or quartz countertops
Creating a home that works for your kids AND your style is possible with the right materials.
Step 6: Build a Shopping List and Compare Prices
This is the part of the design process where moms often shine—because we are natural planners.
Create a Master Shopping List With Links
Include:
- Item
- Price
- Alternatives
- Measurements
- Notes
Track Sales
Stores with consistent sales:
- Target
- Wayfair
- HomeGoods
- Amazon
- IKEA
- TJ Maxx
- Overstock
- Big Lots
- World Market
- Urban Outfitters (great clearance section!)
Budget Tip:
Before buying anything new, search “[item name] + dupe” on Pinterest or Google.
Step 7: Install + Style Your Space
This is where everything comes together beautifully!
Follow These Styling Guidelines
- Hang curtains high and wide
- Layer lighting (ceiling light + lamp + task light)
- Use odd-number groupings for décor (3 or 5 items)
- Add greenery to every room
- Mix tall, medium, and short objects
- Include at least three textures per room
- Hang wall art at eye level (usually 57 inches from the floor)
- Add a rug large enough to anchor the seating area
Pro Mom Advice:
If kids constantly scatter stuff everywhere, use closed storage so your space looks clean even when life isn’t perfect.
Closed storage ideas:
- TV consoles with doors
- Baskets inside open shelving
- Lidded ottomans
- Storage benches
- Sideboards
These pieces hide chaos while helping the room maintain style and order.
Step 8: Evaluate and Adjust
Professional designers always evaluate after installing a room—and moms should too.
Ask yourself:
- What feels right?
- What feels off?
- Do I need more lighting?
- Does the rug feel too big or too small?
- Do I need more storage?
- Is the color palette cohesive?
- What’s missing to make this room feel cozy or complete?
Then adjust accordingly—move a chair, add a lamp, swap pillows, or remove clutter.
Design is a layered process, not a one-and-done project.
Using the Design Process for Specific Mom-Life Spaces
The Living Room
This space needs to be beautiful yet ready for:
- Movie nights
- Playtime
- Guests
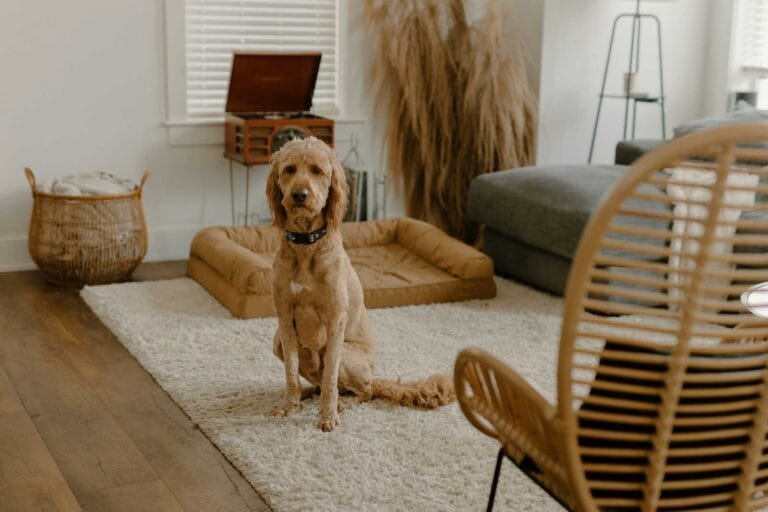
- Crumbs
- Pet hair
- Homework
To stay stylish:
- Use washable slipcovers
- Choose durable rugs
- Add tall woven baskets for toys
- Use floating shelves with minimal décor
- Choose a coffee table with drawers
- Layer a light throw blanket for easy coziness
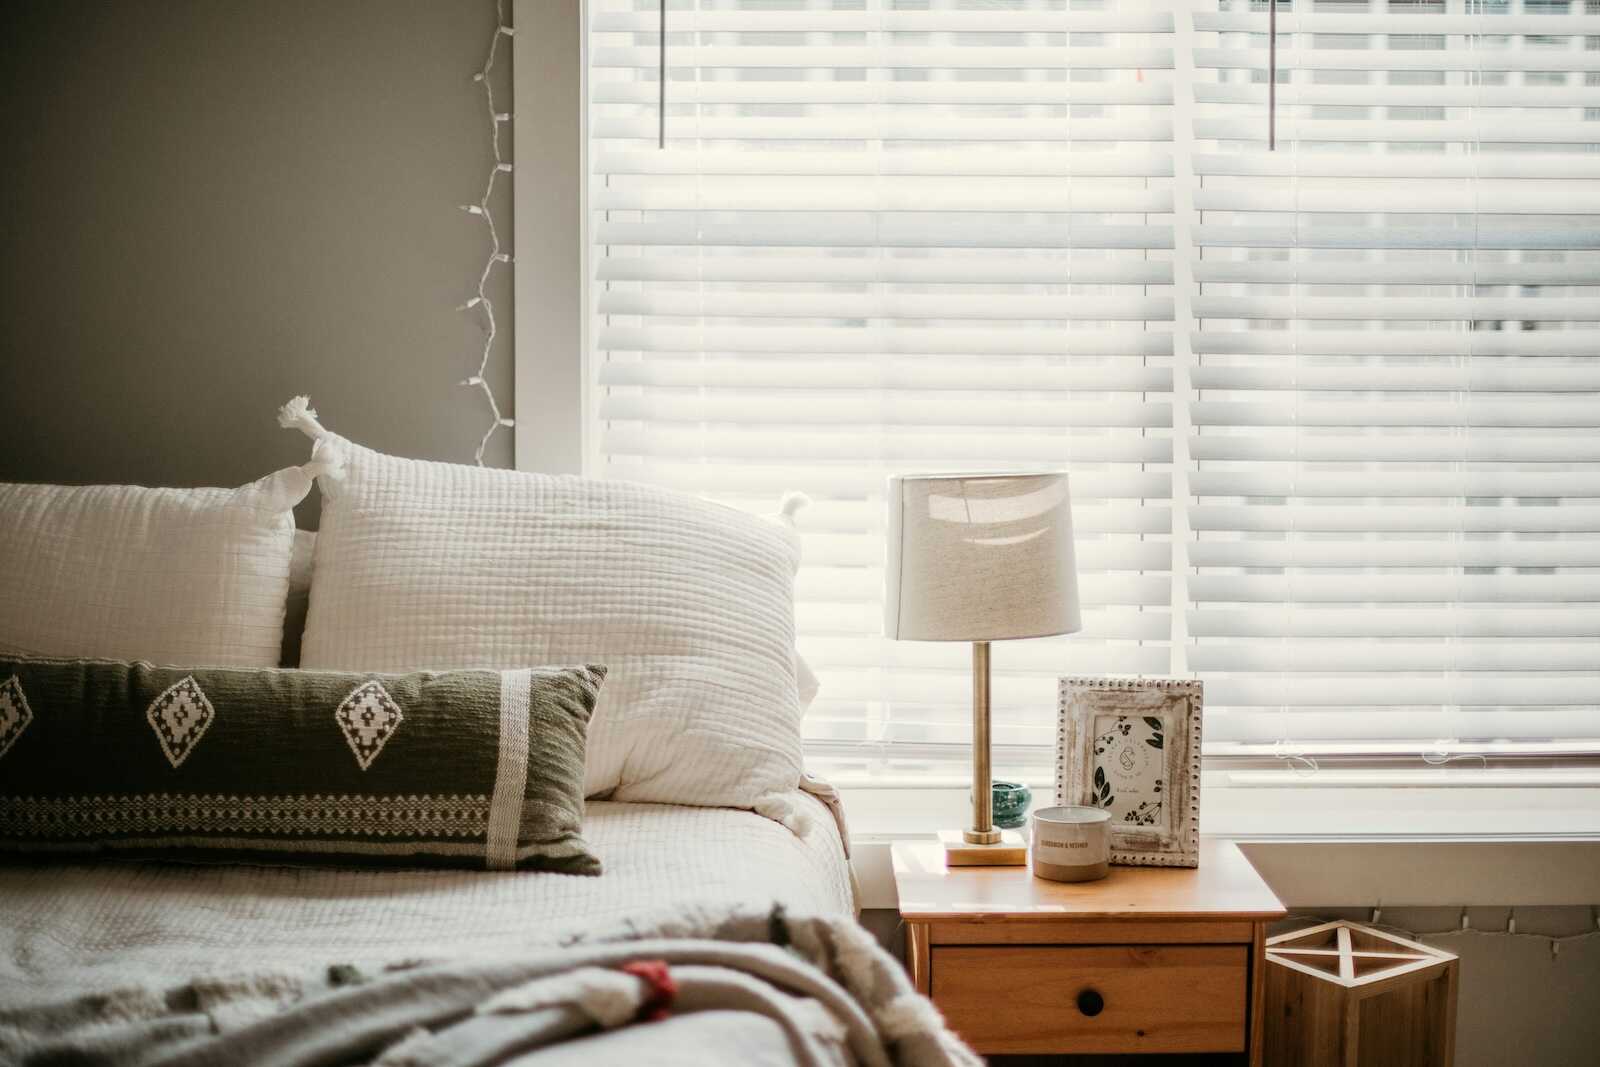
The Bedrooms
Your bedroom deserves to feel like a retreat—even if you share it with kids who sneak in at night.
Use the design process to focus on:
- Soft textures
- A calming color palette
- Matching nightstands (FB Marketplace is great for pairs!)
- Lamps for warm lighting
- A rug under the bed
- Fabric curtains for warmth
Your kids’ bedrooms:
- Keep the big items neutral
- Let THEM choose accent colors
- Use wall decals instead of paint for easy updates
- Utilize under-bed storage
The Kitchen
Even a dated kitchen can feel fresh with small, budget-friendly improvements:
- Peel-and-stick backsplash
- New cabinet hardware
- Open shelving with curated items
- Countertop organization
- A fresh runner rug
- Under-cabinet lighting
- Decluttering (the cheapest makeover!)
Playrooms
Style + storage are your best friends here.
- Use cube shelving with baskets
- Choose a big washable rug
- Create zones (reading corner, art area, toys)
- Add wall decals or playful artwork
- Keep décor minimal
Before and After: What Happens When Moms Use the Design Process
Your home feels calmer.
A well-designed space reduces stress.
You spend money more wisely.
No more impulse buys!
Your rooms work better.
Designing for real life makes daily routines easier.
Your home feels like YOU.
Even on a budget, your personality shines through.
You enjoy being home.
And your kids will too.
Final Thoughts: A Beautiful Home Is Possible on ANY Budget
You don’t need a large home, a designer budget, or endless free time to transform your living spaces. By using the design process step by step, you can create rooms that feel intentional, stylish, functional, and family-friendly—without overspending.
Your home becomes a reflection of your creativity and the love you pour into your family. Each small improvement adds up, and before long, you’ve created a space that feels beautiful, cozy, and truly yours.